How to Use DynDOLOD, TexGen, and xLODGen to Generate LOD
These tools are used to generate LOD (Level of Detail) after you have finalized your load order.
These instructions are specifically for Skyrim, but will work for other supported games with slight modifications.
The official DynDOLOD website: https://dyndolod.info
This tutorial is intended for users of Mod Organizer 2.
Important: Before beginning, ensure you have fully completed your modlist and load order. This includes checking your mods for errors and fixing them in xEdit if needed. This is not a tutorial for building a proper load order. Please refer to https://tes5edit.github.io/docs/7-mod-cleaning-and-error-checking.html for information about this subject.
How to generate terrain LOD using xLODGen (aka SSELODGen)
xLODGen is used to generate terrain LOD.
Download the latest version of xLODGen:
Extract the downloaded file to a location such as C:\xLODGen
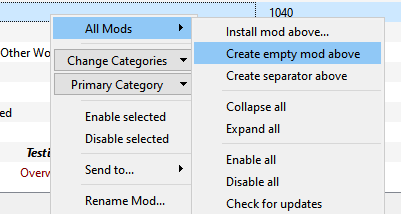
Create an empty mod in MO2 by right-clicking in the left pane:
Name it something identifiable, for example “xLODGen Output”
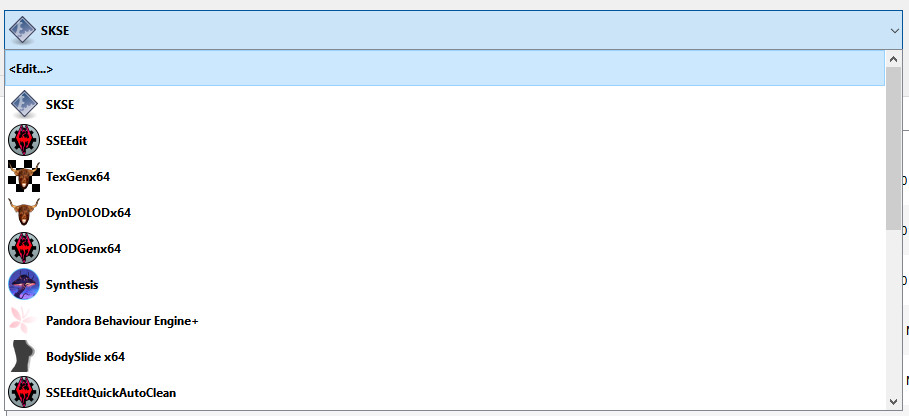
Create an executable in MO2 by clicking the drop-down menu in the upper right of MO2 next to Run. Select <Edit…>
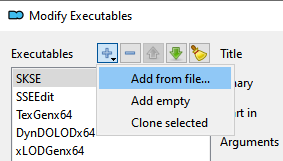
Click the + symbol in the upper left and select “Add from file…” to add an executable:
Navigate to the directory where you extracted xLODGen and select xLODGenx64.exe.
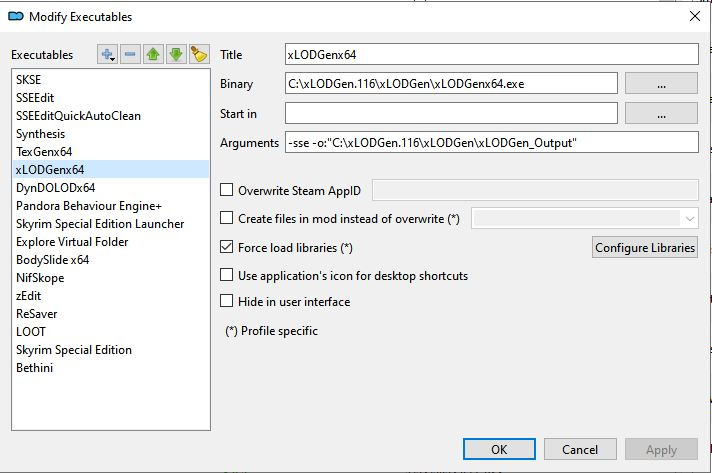
Use the Arguments field to define the game version and to redirect output as seen in the screenshot above (-sse is used for all versions of Skyrim except VR).
For Skyrim VR, use -tes5vr instead of -sse.
You could redirect directly to your xLODGen Output mod if you want to do so.
Additional info for GOG users: https://dyndolod.info/Mods/Skyrim-Special-Edition-GOG-Skyrim-Anniversary-Edition-GOG
Click Apply, then OK.
Download the mod xLODGen Resource - SSE Terrain Tamriel:
https://www.nexusmods.com/skyrimspecialedition/mods/54680
“These plugins add back terrain for Skyrim (Tamriel worldspace) at the outer edges so there is no missing terrain meshes/textures when generating terrain LOD for Skyrim.”
Install and activate the mod. In the right plane, put the plugin high in your load order after any other .esm or .esm flagged plugins.
Note: xLODGen Resource - SSE Terrain Tamriel is only used during terrain generation.
Set xLODGen as the active application in the drop-down, and click Run:
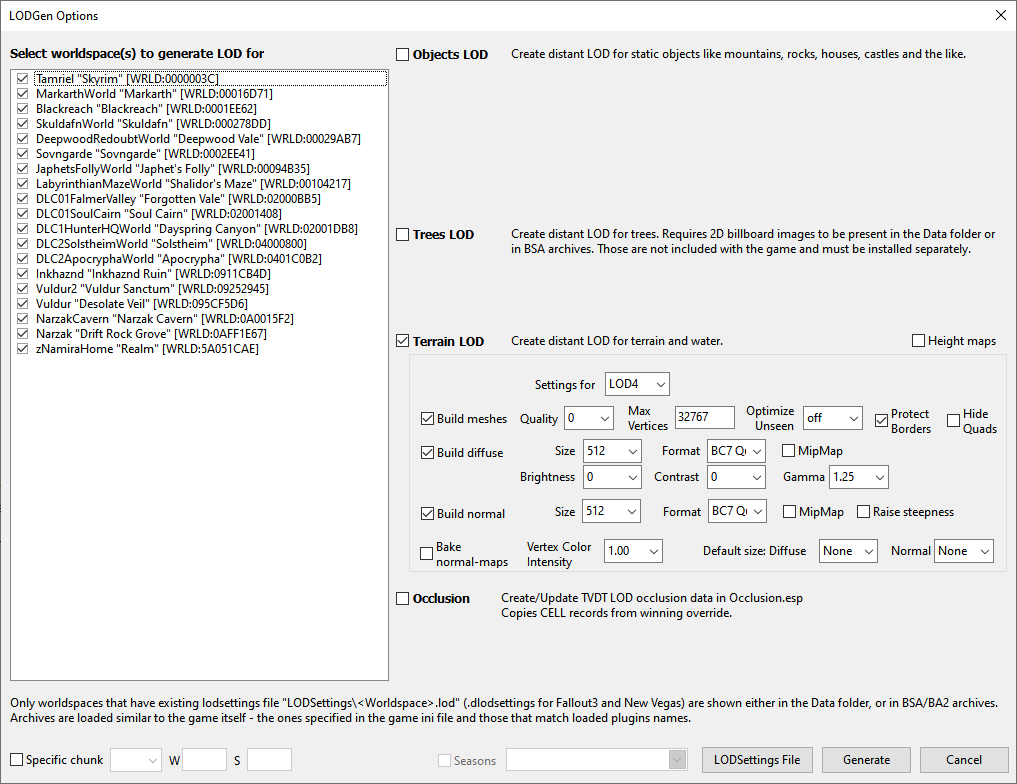
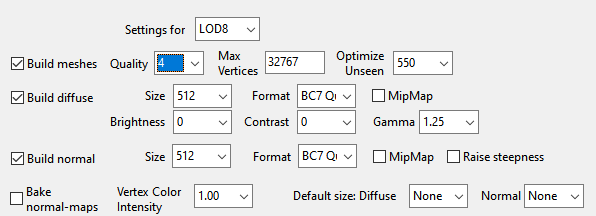
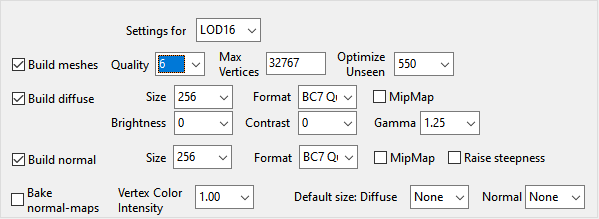
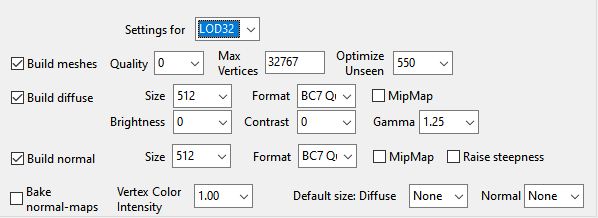
Select all worldspaces on the left and Terrain LOD on the right. I use the following settings:
The above settings are from the STEP Guide:
https://stepmodifications.org/wiki/SkyrimSE:2.3
Now click “Generate”
When completed you will see the following message at the bottom of the log window:
[11:40] LOD generation done.
Generation took 11 minutes 40 seconds for me, your time will vary. Close the log window.
Open the directory where you directed the output:
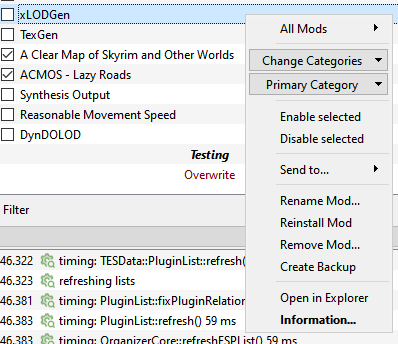
Also open the mod folder you created by right-clicking the mod and selecting “Open in Explorer”
Move the meshes and textures folders from the output folder to the mod folder. Close both windows.
Deactivate the xLODGen Resource mod and active the xLODGen output mod:
Congratulations, you now have terrain LOD.
Download DynDOLOD & Associated Programs
Before running DynDOLOD, you should clean and error check your load order. Doing so will fix problems with mods that may cause DynDOLOD to stop with an error, causing you to have to fix those mods anyway.
https://tes5edit.github.io/docs/7-mod-cleaning-and-error-checking.html
Download DynDOLOD Resources:
https://www.nexusmods.com/skyrimspecialedition/mods/52897?tab=files
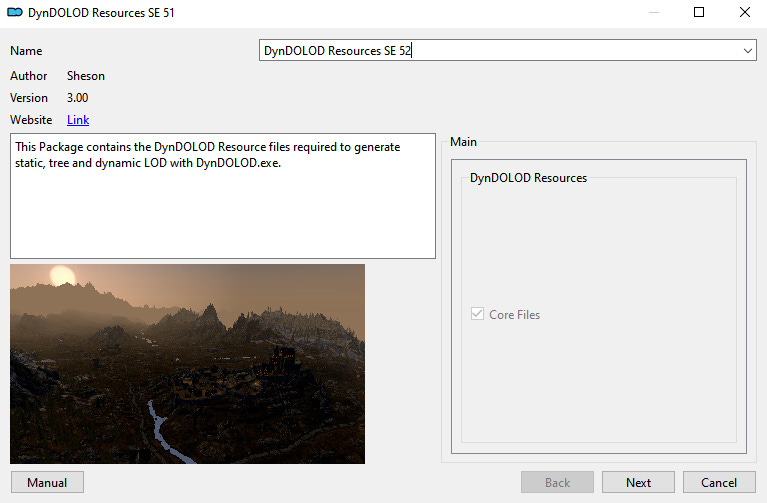
Install to MO2:
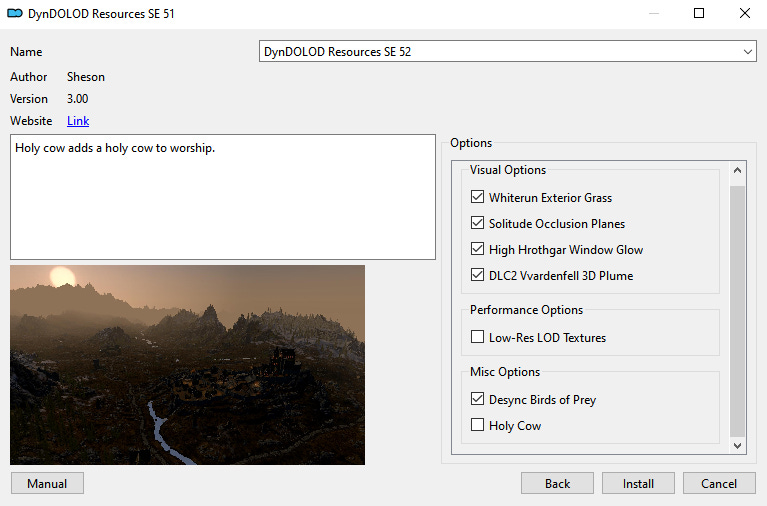
Click Next. Select the following options, then install:
Activate the mod. This mod should be high in your load order so that other mods overwrite any files.
Download DynDOLOD DLL NG:
https://www.nexusmods.com/skyrimspecialedition/mods/97720?tab=files
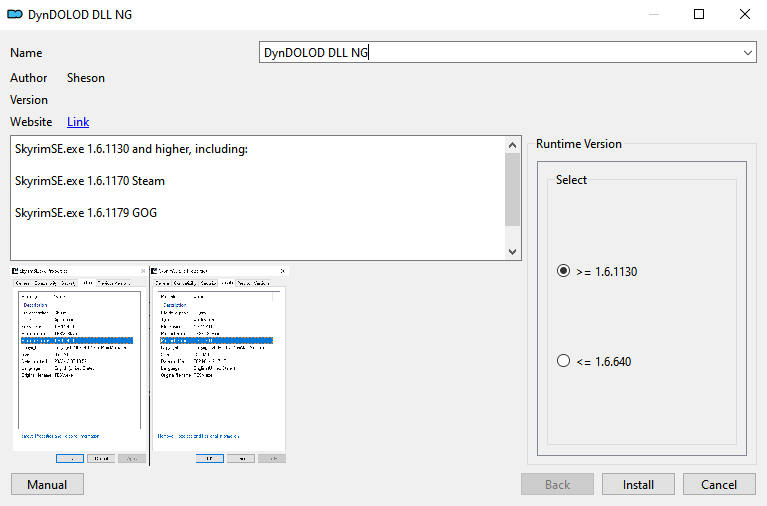
Install to MO2:
Select the appropriate game version:
Active the new mod. Load it after DynDOLOD Resources.
Download DynDOLOD 3 Alpha:
https://www.nexusmods.com/skyrimspecialedition/mods/68518?tab=files
Extract to a directory of your choosing, something like C:\DynDOLOD.
Now, in the left pane of MO2, create a new “TexGen Output” mod and a “DynDOLOD Output” mod like you did above for xLODGen.
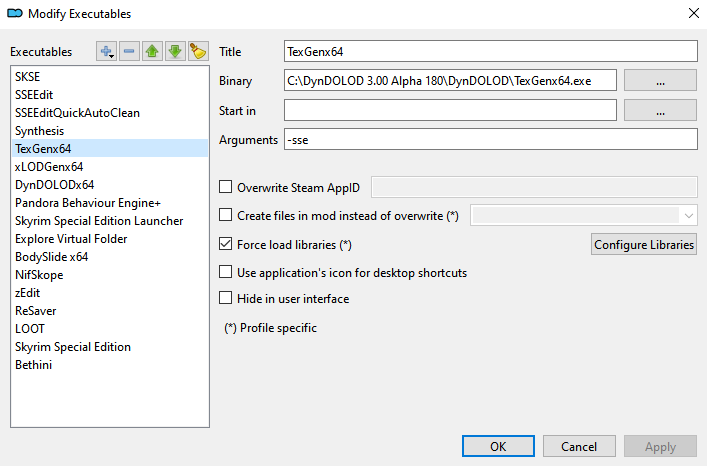
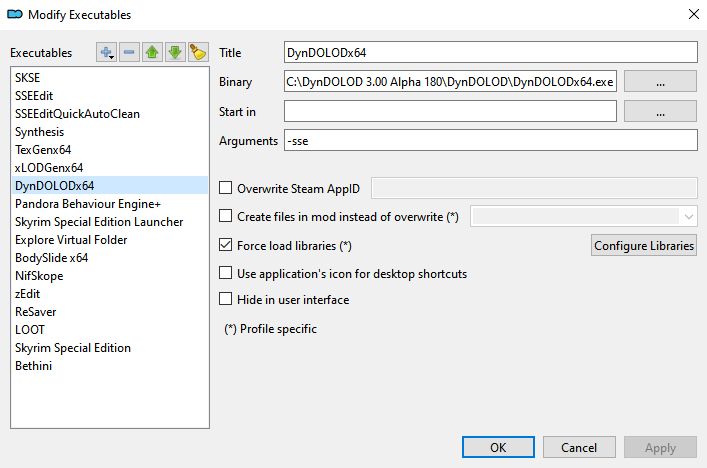
Add the executables just like you previously did with xLODGen. Remember for Skyrim VR, use -tes5vr instead of -sse in the arguments field.
Run TexGen
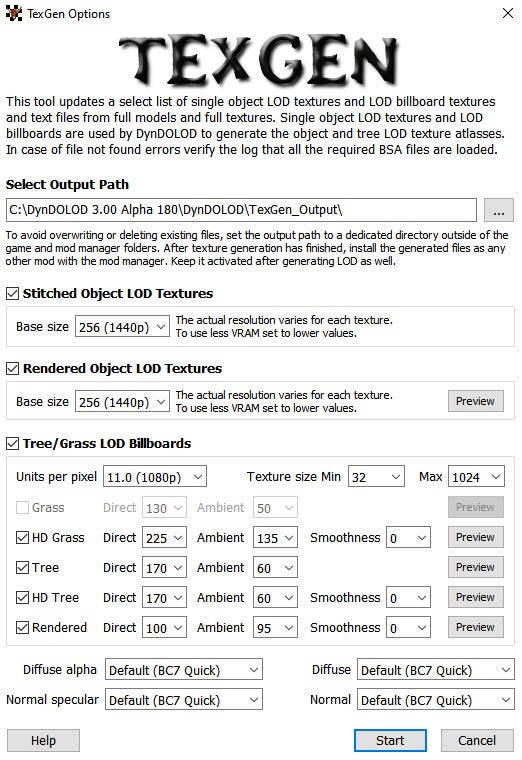
TexGen creates custom tree/grass billboards.
If you have not generated a grass cache, the grass check boxes will be greyed out.
You can use the defaults or change the brightness levels to your preference.
Click Start.
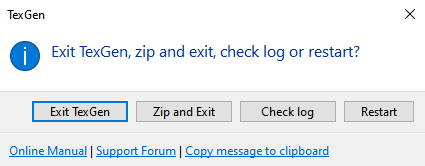
TexGen is fast and will done quickly. Click Exit TexGen. There is no reason to zip it just to extract it again when you install it.
Go to the DynDOLOD directory where the newly created files are, for example, “C:\DynDOLOD 3.00 Alpha 180\DynDOLOD\TexGen_Output”. You will see the textures folder within.
Right click on the TexGen Output mod you created earlier, and select “Open in Explorer”.
Copy or move the textures folder to the empty TexGen Output mod folder.
Enable the TexGen Output mod.
The TexGen Output mod should go at the end of your load order and overwrite everything.
Congratulations you have now created custom tree/grass billboards.
Run DynDOLOD
Click “Run” in the upper right corner of MO2.
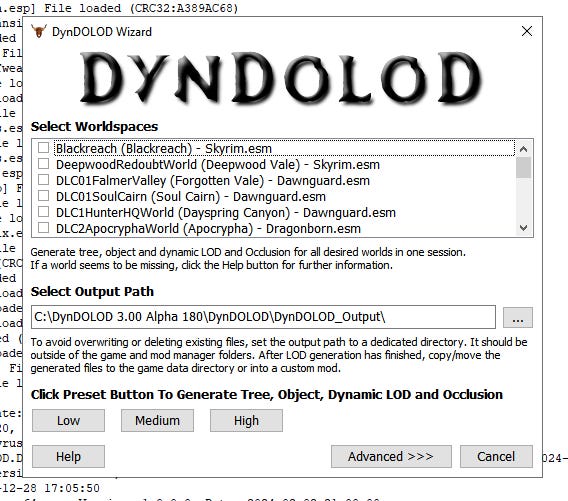
You will be presented with:
This is the simple view. Right-click in worldspaces and select all.
You can select Low, Medium, or High and generate LOD. If you choose this option, skip down to “Click save and exit”.
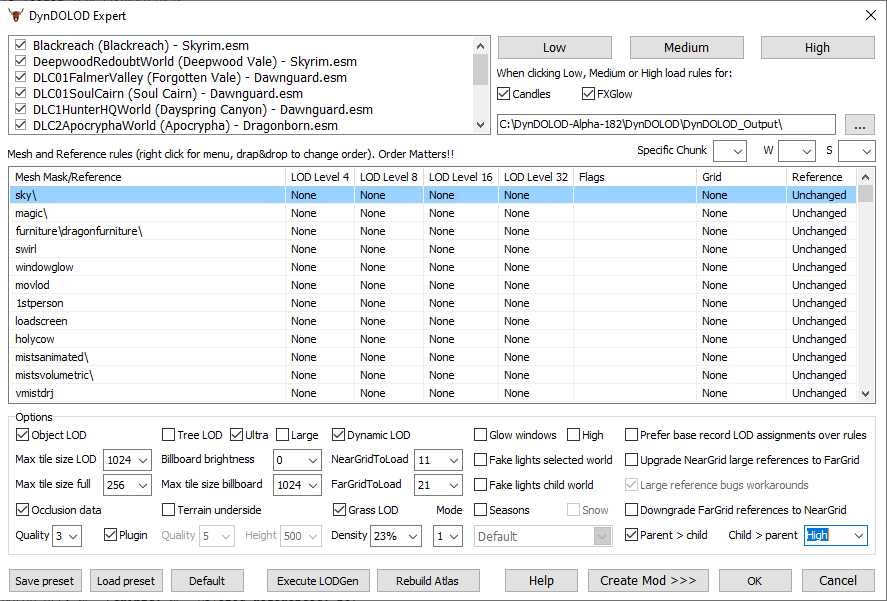
You can further customize the settings by clicking Advanced:
Enable all worldspaces in the upper left window by right-clicking and selecting “Select All”.
Choose Low, Medium, or High, depending on how powerful you think your computer is.
Whether using Tree LOD or Ultra, a good option for the trees rule is to use billboard 4, billboard 4, billboard 1. Scroll all the way to the bottom to change this:
Additionally, “Downgrade FarGrid references to NearGrid” could be selected for near imperceptible performance gains.
You can hover the mouse cursor over the various options to get a pop-up text explaining what they do. You can try various options to your preference.
Here I have Occlusion data set to quality three, which takes longer to generate but is better than the default of 2.
Here I have Grass LOD selected because DynDOLOD detected that a pre-generated grass cache is present. This option will be greyed out if there is no grass cache present.
There are some mods that require specialized DynDOLOD rules, for example “A Clear Map of Skyrim and Other Worlds”. Be sure to read the descriptions and instructions for any mods you use.
What about Seasons of Skyrim? If you want to implement SoS in your game, I suggest you start here: https://dyndolod.info/Help/Seasons
Click OK. DynDOLOD will now run.
If DyDOLOD stops and gives errors, it means you have a bad mod or load order issues. Fixing these is not in scope for this article.
When DynDOLOD completes and opens the results in your web browser, you’re going to see a lot information, and likely a lot of errors. A lot of what you see here are warnings and can be ignored. You can choose to investigate any errors or not. The important thing is that DynDOLOD actually completed and generated its files.
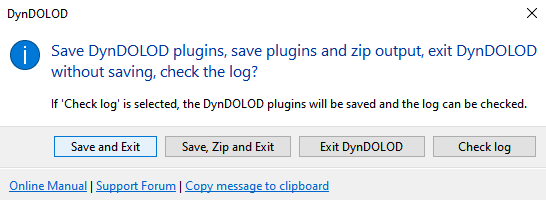
Click Save and Exit:
Open the empty DynDOLOD Output mod that you created earlier by right-clicking and select Open in Explorer.
Go to the DynDOLOD Output folder, which will by default will be nested where you put the extracted DynDOLOD folder, for example, “C:\DynDOLOD 3.00 Alpha 180\DynDOLOD\DynDOLOD_Output”. Copy or move everything in that folder to the empty mod folder you created above. Enable the mod.
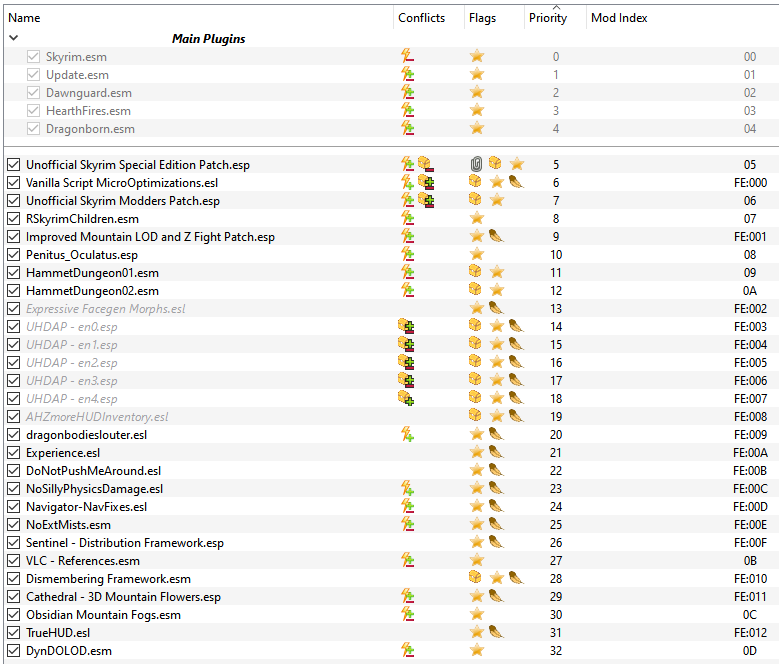
DynDOLOD.esp and Occlusion.esp should be at the bottom of your load order, with Occlusion.esp last.
DynDOLOD.esm should be the last of the master/esl flagged plugins to load, near the top of your load order:
That’s it, you’re done. Congratulations.


